This post contains some brief notes on setting up a Freeduino (or Arduino) and Nokia 3310 LCD shield on Ubuntu Karmic, this should probably work OK for other versions of Ubuntu and other versions of the Freeduino or Arduino.
Installing the Arduino SDK
Firstly, install the Arduino SDK. This requires adding a new repository to your list of software sources, installing the Arduino SDK and removing a conflicting package:
$ sudo add-apt-repository ppa:arduino-ubuntu-team/ppa $ sudo apt-get update $ sudo apt-get install arduino $ sudo apt-get remove brtlly
Now you should be able to find an entry for "Arduino" on your Application -> Programming menu (if you are using Gnome, it might be somewhere slightly different with KDE). That is a link to the Arduino SDK which is a modified version of the Proce55ing IDE if you have used that. It should look like the picture below when you start it. 
Installing the Nokia 3310 libraries
Next, you need libraries for the Nokia 3310 shield. You can download these directly from NuElectronics or get a slightly updated version from Andrew Lindsey: http://blog.thiseldo.co.uk/?p=383 Either way, download the .ZIP file and unpack it somewhere in your home directory. The next bit isn't well documented, but what you need to do is to copy the files from the library to the directories that are expected by the Arduino SDK. Firstly, copy everything over to the Arduino library path:
$ sudo cp -a nokia_3310_lcd /usr/share/arduino/libraries/
Now, if you restart the Arduino SDK and look up Sketch -> Import Library on the menu, you should see nokia_3310_lcd as an item on the list there.
Next, you need to put the example Arduino application where the IDE can find it:
$ sudo cd /usr/share/arduino/libraries/nokia_3310_lcd $ sudo mkdir /usr/share/doc/arduino/examples/Nokia $ sudo mv examples /usr/share/doc/arduino/examples/Nokia
Try everything out
Now, if you place the Nokia shield on top of your Arduino or Freeduino (it only fits one way), and attached the Arduino to your USB port you should be able to try out the example application. Restart the Arduino SDK, make sure you go to Tools -> Board and select the board you are using -- look on the long chip on the board to find out whether you have an ATmega328 or ATmega168 if you are not sure. Also, go to Tools -> Serial Port to select the port that has been assigned to the Arduino. If Serial Port is greyed out on the menu then unplug the Arduino from the USB port and put it back in again (to force the OS to reassign a new virtual USB device to the Arduino).
Now, go to File -> Examples -> Nokia and open up the example "sketch" or program. Press the Verify button (that looks like a triangle) to compile the sketch. If you have placed the libraries in the right place you should get a message like this at the bottom of the GUI:
Binary sketch size: 3858 bytes (of a 30720 byte maximum)
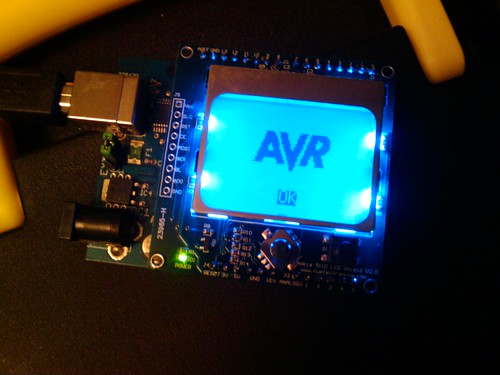
Lastly, press the Upload button (the one with an arrow pointing right) to upload the compiled code to the board, and you should see something like the results in the photo below.